Would you like to learn how to configure PFsense LDAP authentication on Active directory? In this tutorial, we are going to show you how to authenticate PFSense users using the Active directory database from Microsoft Windows and the LDAP protocol.
• Pfsense 2.4.4-p3
PFsense Related Tutorial:
On this page, we offer quick access to a list of tutorials related to pfSense.
Tutorial Windows - Domain controller Firewall
First, we need to create a Firewall rule on the Windows domain controller.
This firewall rule will allow the Pfsense server to query the Active directory database.
On the domain controller, open the application named Windows Firewall with Advanced Security
Create a new Inbound firewall rule.
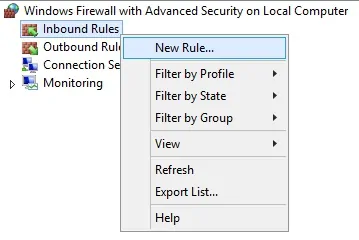
Select the PORT option.
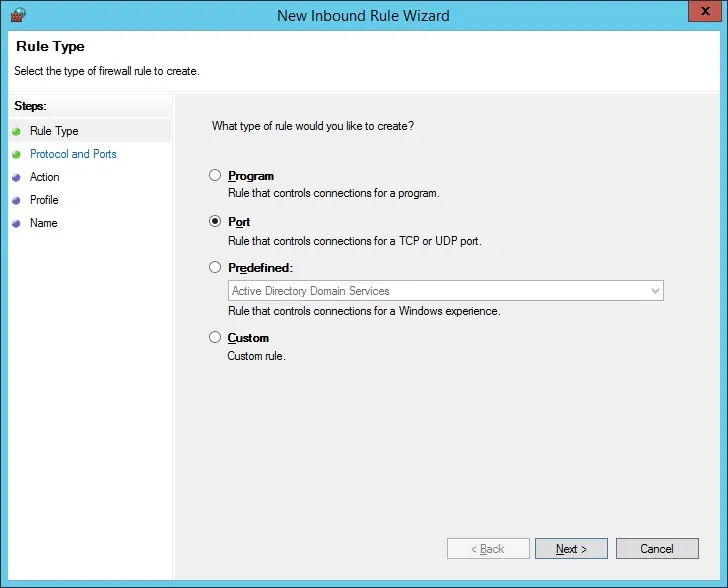
Select the TCP option.
Select the Specific local ports option.
Enter the TCP port 389.
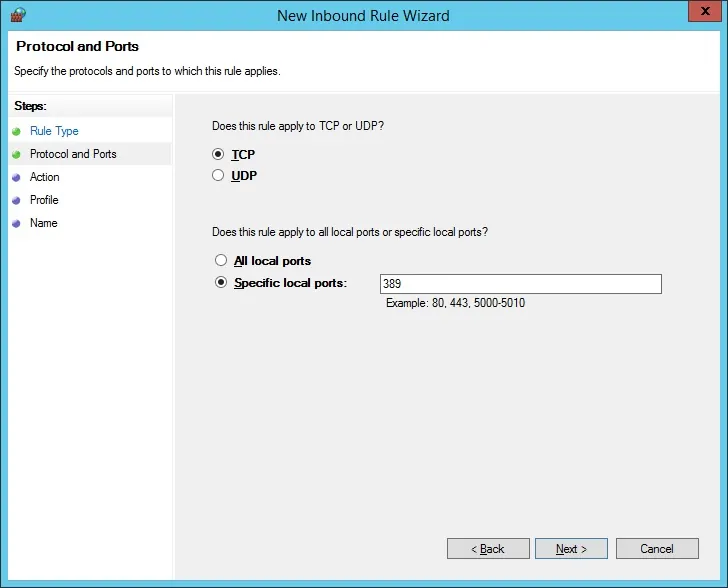
Select the Allow the connection option.
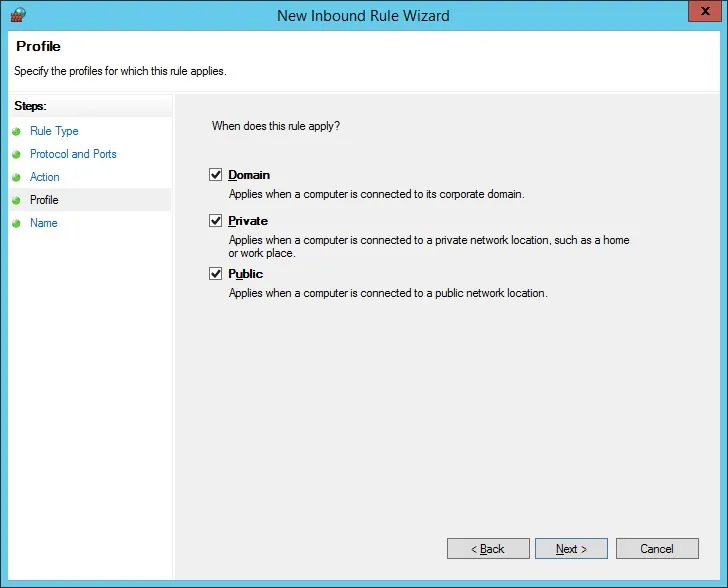
Check the DOMAIN option.
Check the PRIVATE option.
Check the PUBLIC option.
Enter a description to the firewall rule.
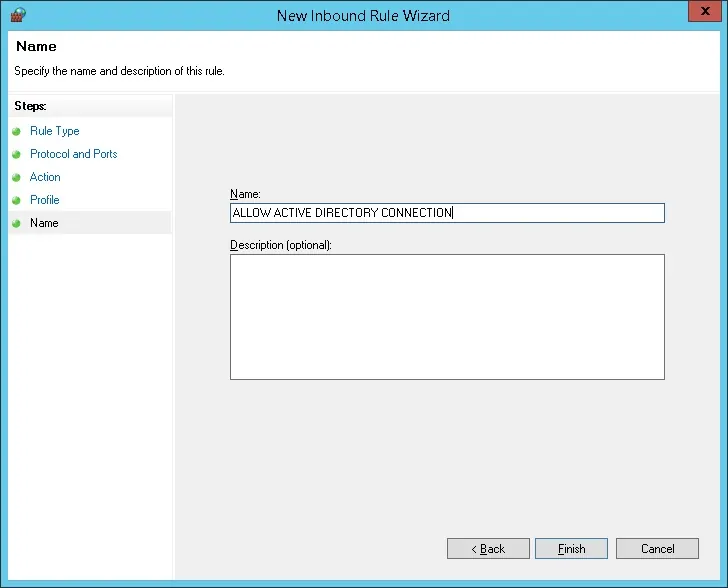
Congratulations, you have created the required firewall rule.
This rule will allow Pfsense to query the Active directory database.
Tutorial Windows - Domain Account Creation
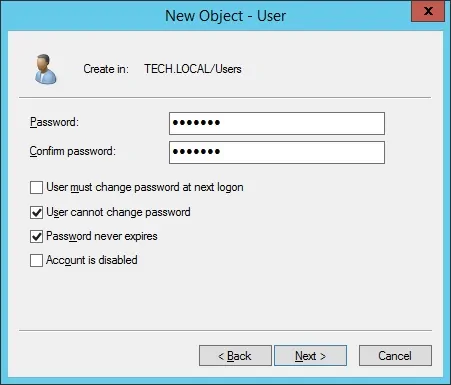
Next, we need to create at least 2 accounts on the Active directory database.
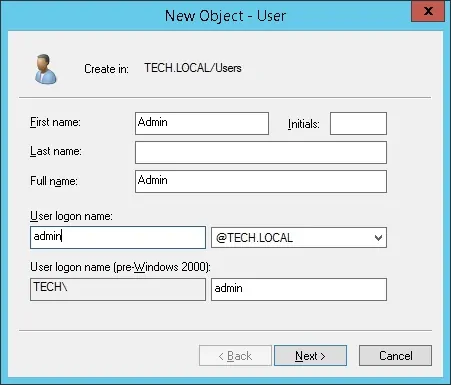
The ADMIN account will be used to login on the Pfsense web interface.
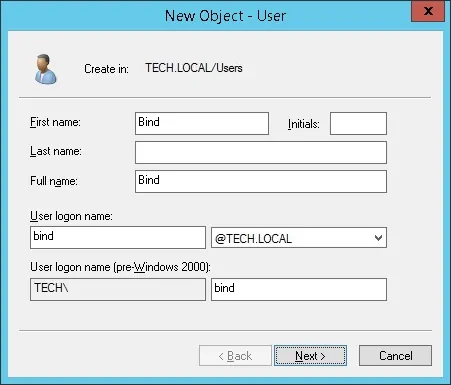
The BIND account will be used to query the Active Directory database.
On the domain controller, open the application named: Active Directory Users and Computers
Create a new account inside the Users container.
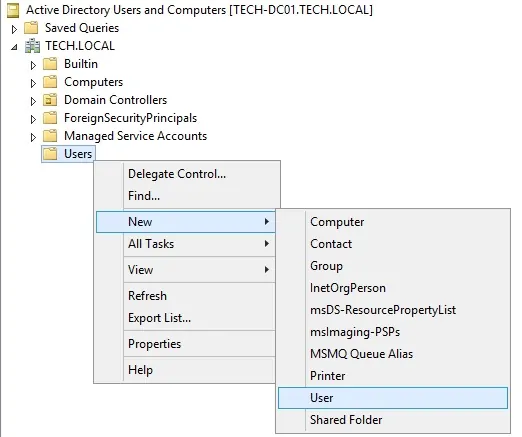
Create a new account named: admin
Password configured to the ADMIN user: 123qwe..
This account will be used to authenticate as admin on the Pfsense web interface.
Create a new account named: bind
Password configured to the BIND user: 123qwe..
This account will be used to query the passwords stored on the Active Directory database.
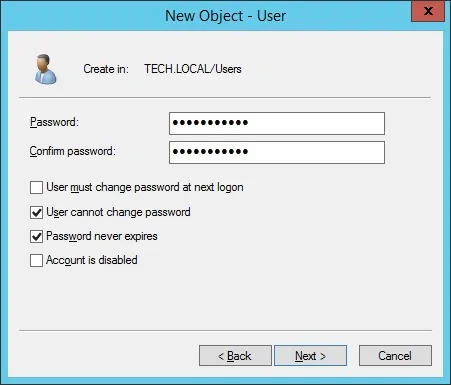
Congratulations, you have created the required Active Directory accounts.
Tutorial Windows - Domain Group Creation
Next, we need to create at least 1 group on the Active directory database.
On the domain controller, open the application named: Active Directory Users and Computers
Create a new group inside the Users container.
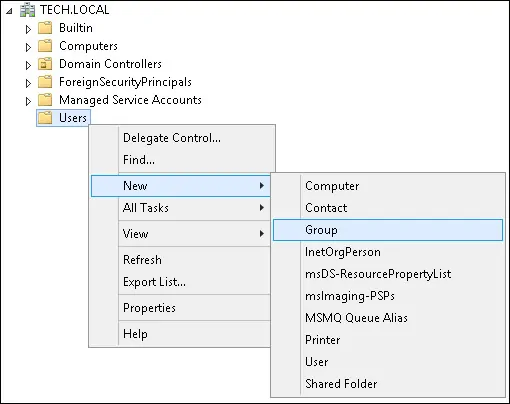
Create a new group named: pfsense-admin
Members of this group will have the Admin permission on the PFsense web interface.
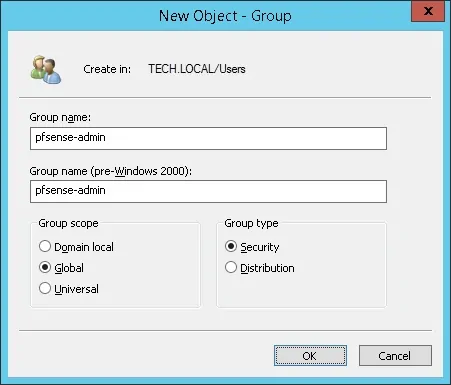
Important! Add the admin user as a member of the pfsense-admin group.
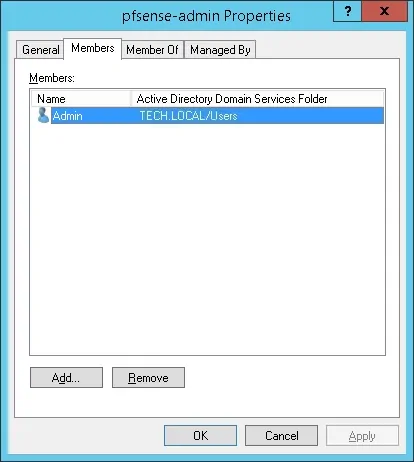
Congratulations, you have created the required Active Directory group.
PFSense - LDAP authentication on Active Directory
Open a browser software, enter the IP address of your Pfsense firewall and access web interface.
In our example, the following URL was entered in the Browser:
• https://192.168.15.11
The Pfsense web interface should be presented.

On the prompt screen, enter the Pfsense Default Password login information.
• Username: admin
• Password: pfsense
After a successful login, you will be sent to the Pfsense Dashboard.
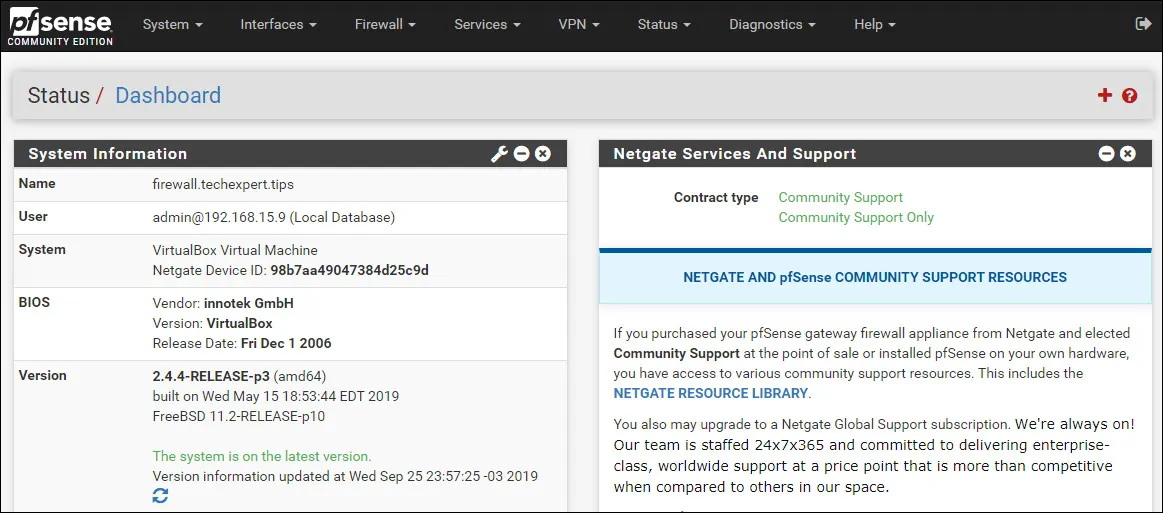
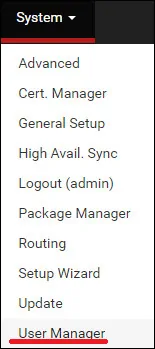
Access the Pfsense System menu and select the User manager option.
On the User manager screen, access the Authentications servers tab and click on the Add button.

On the Server settings area, perform the following configuration:
• Description name: ACTIVE DIRECTORY
• Type: LDAP

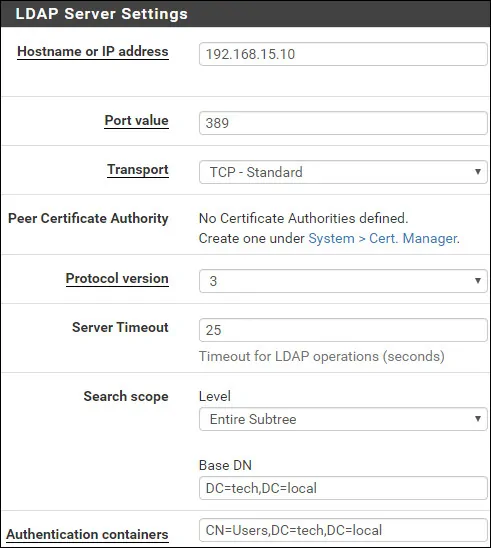
On the LDAP Server settings area, perform the following configuration:
• Hostname or IP address - 192.168.15.10
• Port value - 389
• Transport - TCP - Standard
• Protocol version - 3
• Server Timeout - 25
• Search Scope - Entire Subtree
• Base DN - dc=tech,dc=local
• Authentication containers - CN=Users,DC=tech,DC=local
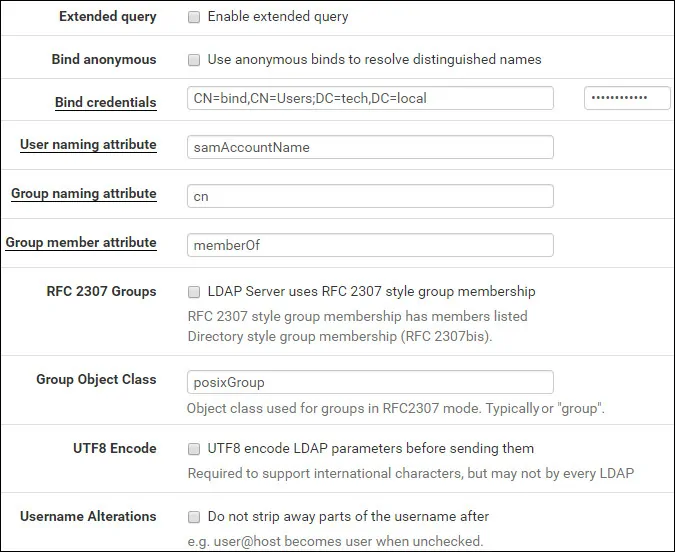
• Extended query - Disabled
• Bind anonymous - Disabled
• Bind credentials - CN=bind,CN=Users,DC=tech,DC=local
• Bind credentials Password - Password of the BIND user account
• Initial Template - Microsoft AD
• User naming attribute - samAccountName
• Group naming attribute - cn
• Group member attribute - memberOf
• RFC 2307 Groups - Disabled
• Group Object Class - posixGroup
• UTF8 Encode - Disabled
• Username Alterations - Disabled
You need to change the IP address to your domain controller IP.
You need to change the domain information to reflect your Network environment.
You need to change the bind credentials to reflect your Network environment.
Click on the Save button to finish the configuration.
In our example, we configured the Ldap server authentication on the PFSense firewal.
PFSense - Testing the Active Directory authentication
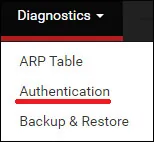
Access the Pfsense Diagnostics menu and select the Authentication option.
Select the Active directory authentication server.
Enter the Admin username, its password and click on the Test button.

If your test succeeds, you should see the following message.
Congratulations! Your PFsense LDAP server authentication on Active Directory was sucessfully configured.
PFSense - Active Directory Group Permission
Access the Pfsense System menu and select the User manager option.

On the User manager screen, access the Groups tab and click on the Add button.

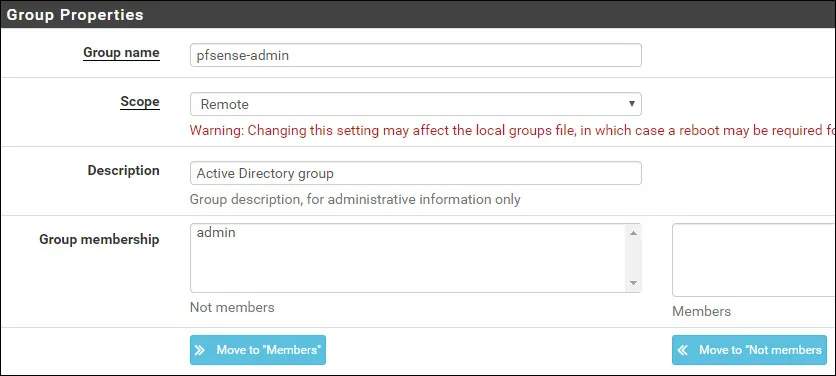
On the Group creation screen, perform the following configuration:
• Group name - pfsense-admin
• Scope - Remote
• Description - Active Directory group
Click on the Save button, you will be sent back to the Group configuration screen.
Now, you need to edit the permissions of the pfsense-admin group.
On the pfsense-admin group properties, locate the Assigned Privileges area and click on the Add button.
On the Group privilege area, perform the following configuration:
• Assigned privileges - WebCfg - All pages
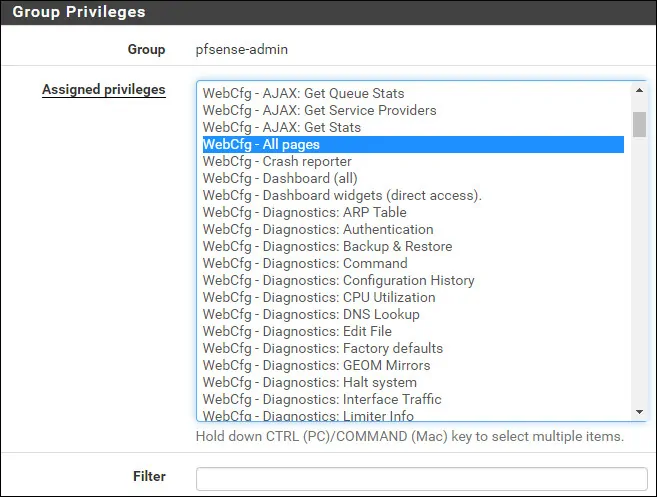
Click on the Save button to finish the configuration.
PFSense - Enable the Active Directory authentication
Access the Pfsense System menu and select the User manager option.

On the User manager screen, access the Settings tab.

On the Settings screen, select the Active directory authentication server.
Click on the Save and test button.
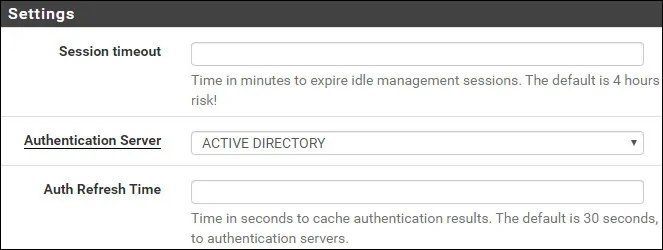
After finishing your configuration, you should log off the Pfsense web interface.
Try to login using the admin user and the password from the Active Directory database.
On the login screen, use the admin user and the password from the Active Directory database.
• Username: Admin
• Password: Enter the Active directory password.

Congratulations! You have configured the PFSense authentication to use the Active Directory database.
