Would you like to learn how to add a custom header on the IIS server? In this tutorial, we are going to show you how to configure the IIS server to add an HTTP header.
• Windows 2012 R2
• Windows 2016
• Windows 2019
Equipment list
The following section presents the list of equipment used to create this tutorial.
As an Amazon Associate, I earn from qualifying purchases.
Windows Tutorial:
On this page, we offer quick access to a list of Windows tutorials.
Tutorial IIS - Add a header
Start the application named: IIS Manager.

On the IIS Manager application, select your website.
On the right part of the screen, access the option named: HTTP Response Headers.

On the top right part of the screen, click on the Add option.

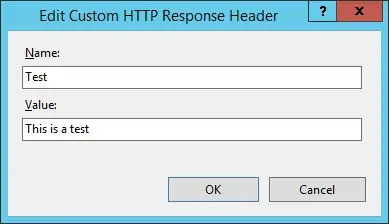
To add an HTTP header, enter the following configuration:
• NAME - Enter an identification to the new HTTP header.
• VALUE - Enter a value to the new HTTP header.
Click on the OK button.

Optionally, use the command-line to add a custom HTTP header.
In our example, we add an HTTP header on the default website of an IIS server.
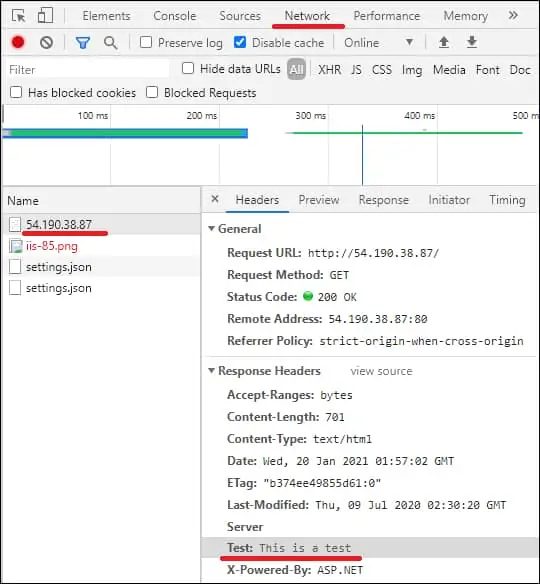
To test the installation, open the Chrome browser on a remote computer and enter the IP address of your web server using the HTTP protocol.
In our example, the following URL was entered in the Browser:
• http://54.189.98.159
Use the page inspection feature of the google chrome browser to verify the Headers from your server.

Optionally, you may use the CURL command of a Linux computer to test the header configuration.
Here is the command output.
Congratulations! You configured an HTTP header on the IIS server.
