Would you like to learn how to change the Pfsense language?In this tutorial, we are going to show you all the steps required to change the pfsense web interface language 5 minutes or less.
• Pfsense 2.4.4-p3
PFsense Related Tutorial:
On this page, we offer quick access to a list of tutorials related to pfSense.
PFSense - Language Configuration
Open a browser software, enter the IP address of your Pfsense firewall and access web interface.
In our example, the following URL was entered in the Browser:
• https://192.168.15.30
The Pfsense web interface should be presented.

On the prompt screen, enter the Pfsense Default Password login information.
• Username: admin
• Password: pfsense
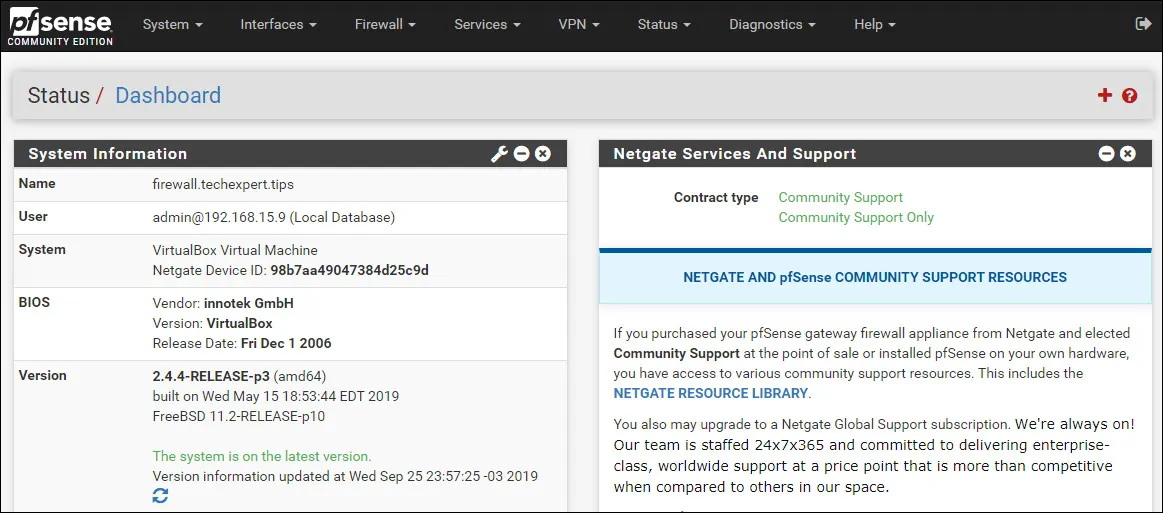
After a successful login, you will be sent to the Pfsense Dashboard.

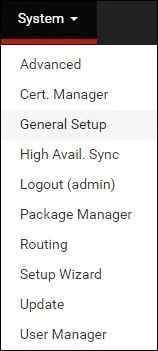
Access the Pfsense System menu and select the General Setup option.

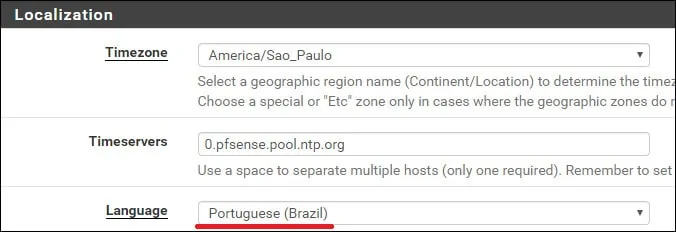
On the General settings screen, locate the Localization area and change the Language settings.

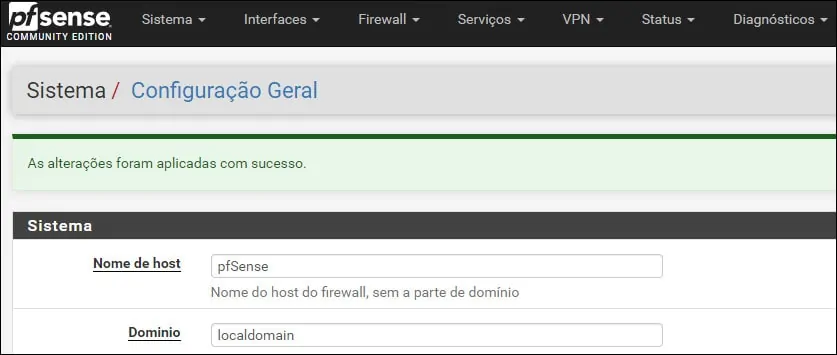
Click on the Save button to change the Pfsense language immediately.

In our example, the Pfsense language was changed to Portuguese.
Congratulations! You have finished the Pfsense language configuration.
