Would you like to learn how to install Snort on Pfsense?In this tutorial, we are going to show you all the steps required to perform the Snort installation on a Pfsense server in 5 minutes or less.
• Pfsense 2.4.4-p3
PFsense Related Tutorial:
On this page, we offer quick access to a list of tutorials related to pfSense.
PFSense - Snort Installation
Open a browser software, enter the IP address of your Pfsense firewall and access web interface.
In our example, the following URL was entered in the Browser:
• https://192.168.15.30
The Pfsense web interface should be presented.

On the prompt screen, enter the Pfsense Default Password login information.
• Username: admin
• Password: pfsense
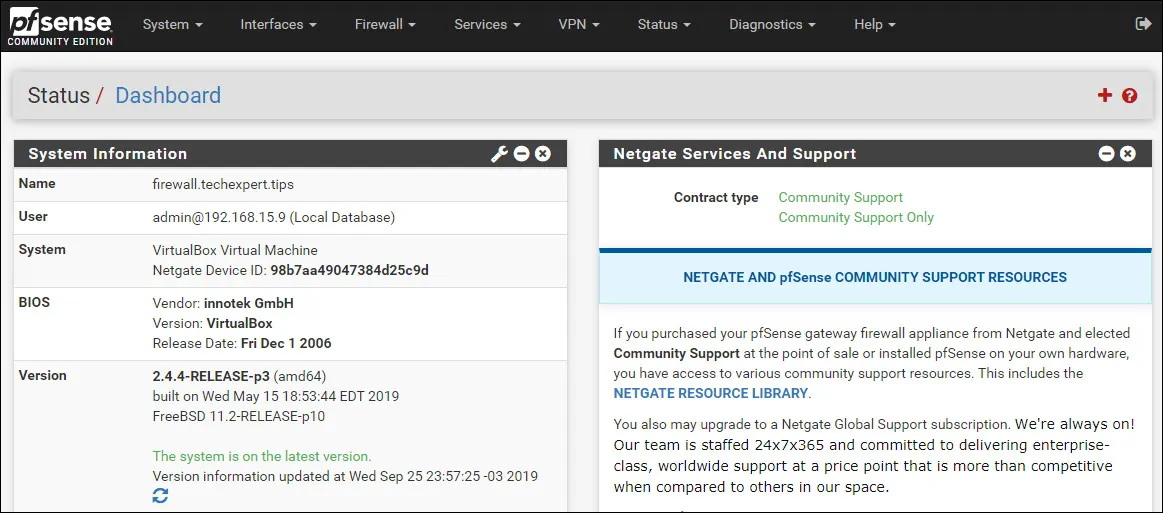
After a successful login, you will be sent to the Pfsense Dashboard.
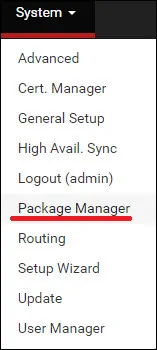
Access the Pfsense System menu and select the Package manager option.
On the package manager screen, access the Available packages tab.
On the Available packages tab, search for SNORT and install the Snort package.

In our example, we installed the Snort package version 3.2.9.10.
Wait the Snort installation to finish.
Access the Pfsense Services menu and select the Snort option.

On the Global settings tab, locate the Snort Subscriber Rules and perform the following configuration:
• Enable Snort VRT - Yes
• Snort Oinkmaster Code - Enter you OikCode
If you don't have an Oinkcode, access the Snort website, create an account and get a free Oinkcode.

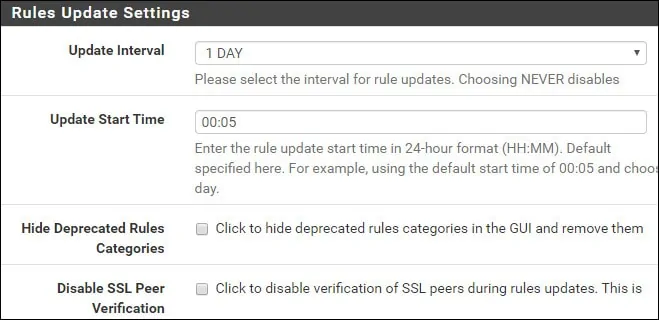
Locate the Rules Update Settings area and perform the following configuration:
• Update Interval - Select the desired update interval
• Update Start Time - Set the desired time to update the Snort rules
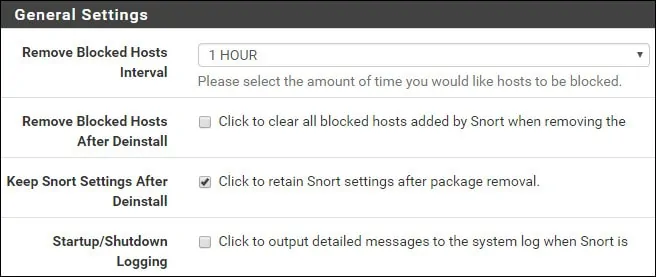
Locate the General Settings area and perform the following configuration:
• Remove Blocked Hosts Interval - 1 Hour
• Remove Blocked Hosts After Deinstall - No
• Keep Snort Settings After Deinstall - Yes
• Startup/Shutdown LoggingUpdate Interval - no
On the Updates tab, Click on the Update rules button to download the Snort rules.

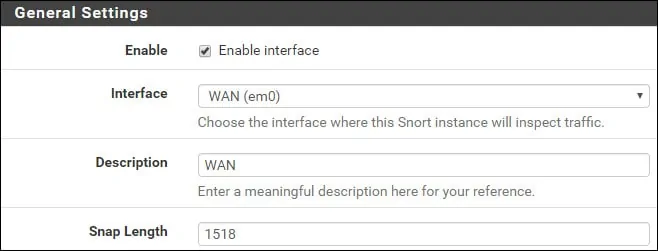
On the Snort Interfaces tab, Click on the Add button and perform the following configuration.
• Enable - Yes
• Interface - Select the desired interface to monitor
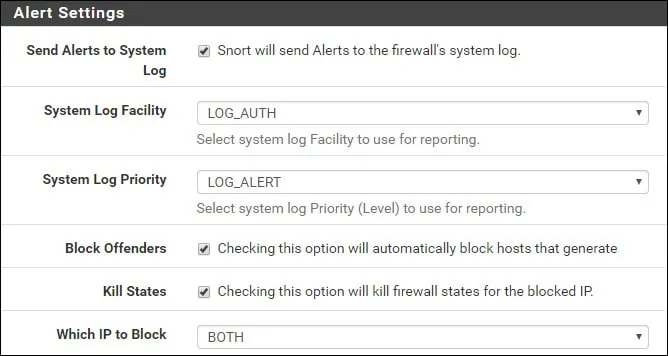
Locate the Alert Settings area and perform the following configuration:
• Send Alerts to System Log - Yes
• Block Offenders - Enable if you want to block offenders
• Kill States - Yes
• Which IP to Block - BOTH
After finishing the configuration, click on the Save button.
On the Snort interfaces screen, edit the interface configuration.

Access the Wan categories tab and perform the following configuration:
• Resolve Flowbits - Yes
• Use IPS Policy - Yes
• IPS Policy Selection - Connectivity
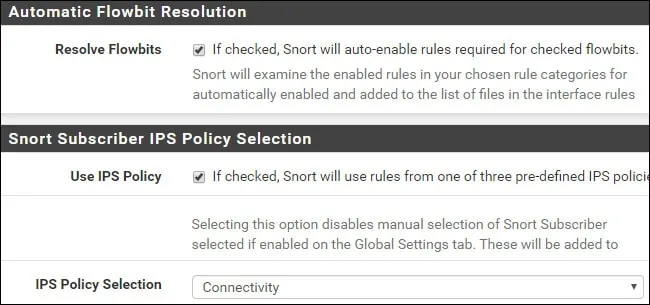
In our example, we enabled the IPS feature and selected the policy named Connectivity.
After finishing the configuration, click on the Save button and start the Snort service on the interface.

Congratulations! You have finished the Snort installation on a Pfsense server.
